*** I wrote this post before my daughter was born, but didn't manage to finish it before Hadley Kate arrived on 10/15/2011, so four months later... here's the post about her nursery!***
So it's been a long time since I've posted anything... I've been on a hiatus from making anything new for Etsy, as I've been preparing for the arrival of our daughter in October! I'm hoping to get back at it once she arrives and we get into a routine (whenever that may be). In the meantime, I wanted to share some photos of her nursery as it comes together.

When we moved in to this house, this room was "lovingly" called "the wood room" because it was wood paneled, and pretty much brown everywhere. All the trim was wood, the closet doors were bare wood - even the light switch cover was brown. Pretty much the most heinous room you can image. Here's a "before" picture (Yikes!):
So... 3 years of "gentle" nagging later, I finally convinced my husband to help me paint the room. Boy - I never want to do that again. Getting a good coverage over that terrible wood and getting into all the crevices and cracks was a major pain. But in the end, it turned out fantastic, and I love the color. It's a gray-ish blue, and is very calming.
So when we found out we were having a girl, we didn't even consider repainting the room, not even for a second. First of all, I never want to paint that room again. Second, I don't think theres anything wrong with having a blue room for a little girl. I certainly wasn't going to paint the room pink. So I decided to "girl it up" with accents of that English Rose color, and stick to white furniture since the walls were already a bit bold.
I made her crib bedding (with the exception of the sheets). The bumper fabric is called Selim Punch, and it's made by Braemore. I coordinated it with an upholstery weight textured fabric in a color I like to call English Rose to make the skirt and the bumper ties. The bumper pads are Fairfield Nu-Foam Polyfil Bumper Pads. A set comes with 6 pads, but they felt a bit thin by themselves - so I doubled up for a more cushion-y feel.

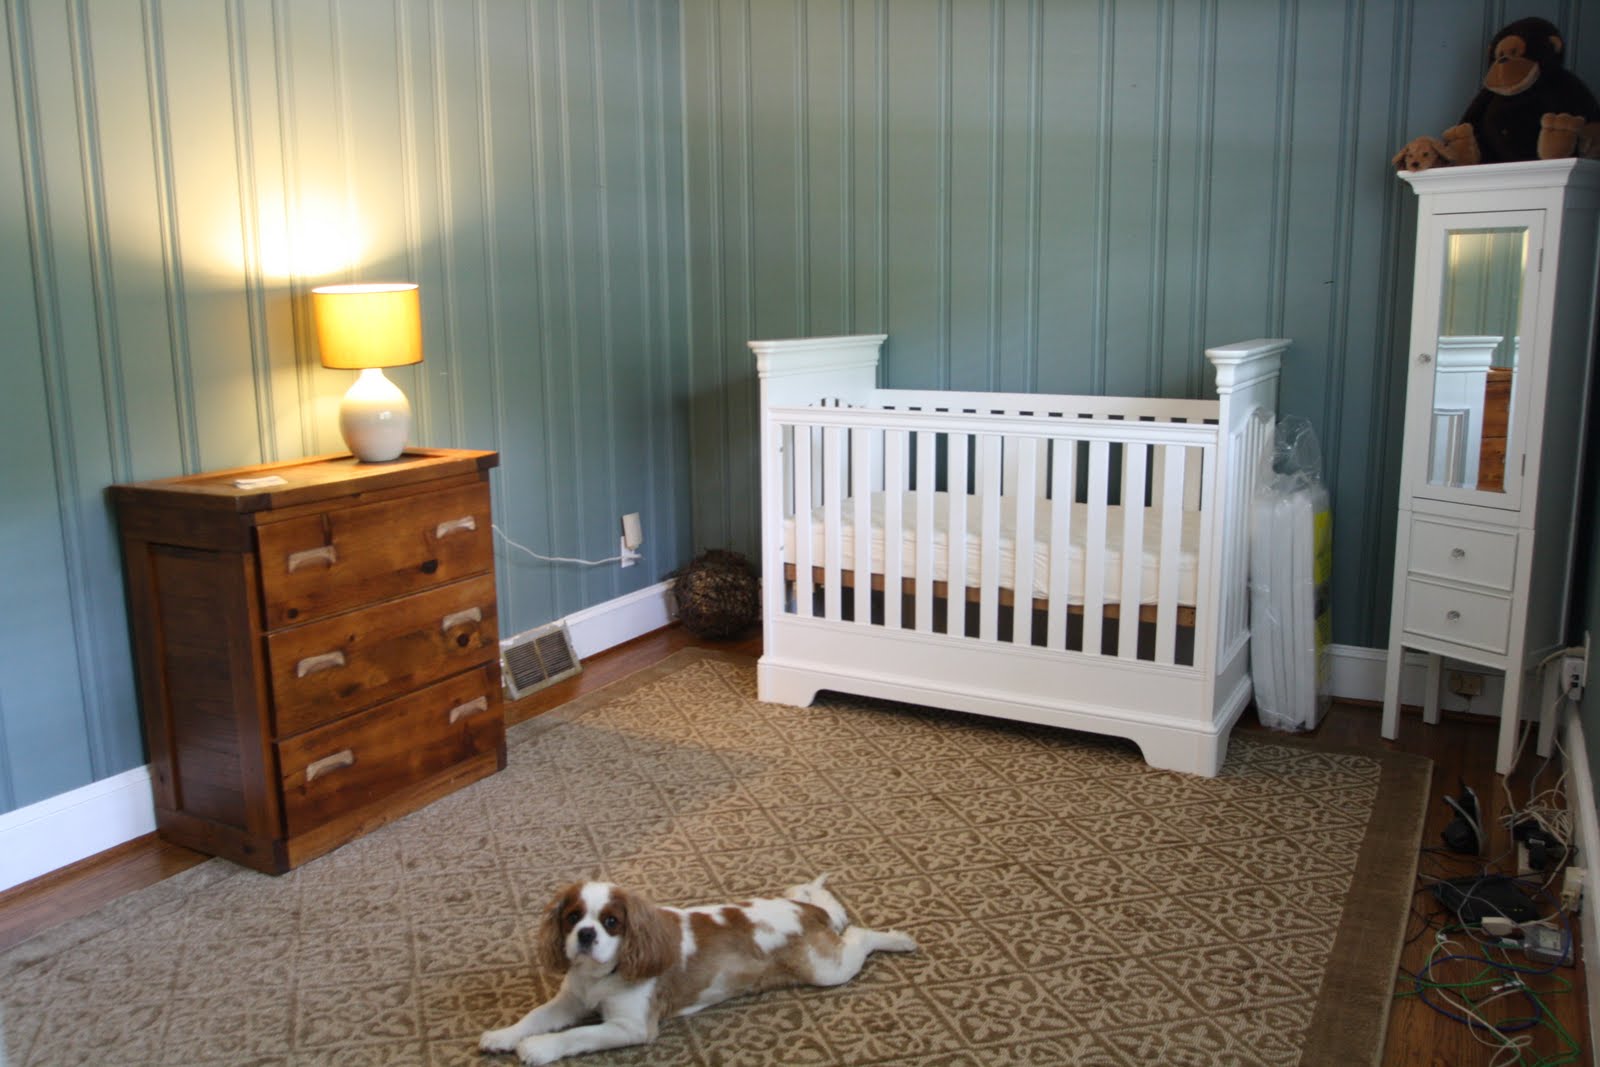
The dresser we are using was my mother's, and I grew up with it in my room (before picture on left). We simply painted it white, I lined the drawers with contact paper, and we changed out the handles for fabulous knobs courtesy of Anthropologie (my favorite stop for unique hardware). I think it turned out fantastic. The changing pad fits perfectly on top, and is secured with screws into the back of the dresser. Easily removed when no longer needed, and you're not stuck with a changing table that serves no other purpose.


The crib is made by Stanley, and I totally lucked out by scoring a floor model from a local boutique that carries that brand for a fantastic price. The best part - the crib was still in the box, it had been purchased to be a floor model but never made it on the floor!
The crib mobile is just an oval wreath from Michaels, with a grapevine ball suspended from the center. I used wire wrapped in grapevine-like material to tie it all together, and suspended it from the ceiling using a simple o-ring from Lowes wrapped in the same wire. The adorable birds are made by Megan of MySweetPumpkin (
www.etsy.com/people/MySweetPumpkin). She custom made me 5 birds in rose colored wool felt, and embroidered them with those gorgeous flowers and designs. She even held one back until we decided on a name so she could embroider her name on one of the birds. Since her name is going to be a secret, I'm waiting to add it to the mobile until she gets here. But it will hang from the middle of the grapevine ball. I think once she is too old for the mobile the birds will make great christmas tree decorations!
We realized quickly that we needed some extra storage for the room - so my handy husband set about building a shelf that could hold baskets for storing diapers, burp cloths, toys, whatever. He scaled it to fit well next to the dresser, for easy access to changing supplies and such. I think it turned out fantastic. I can definitely see my daughter painting this a funky color when she gets older (if she's anything like I was as a teenager, I was constantly painting things I shouldn't).
I had this bench as a baby - my sister and I both had one. I believe my mother added the stencils - and bless her heart - she had kept both of them all these years. I finally retrieved mine from her when I found out I was pregnant. My intent was (of course) to paint it a fun color and let it just serve as a decorative item. But it just seemed to be in the way, and I didn't like that it didn't serve a purpose. And I couldn't bring myself to paint over this pretty wood or my mother's stenciling work. SO - I grabbed a couple of cast iron brackets I had previously bought off of eBay, drilled those suckers into each side to serve as bookends, and voila - baby bench turned bookshelf. It won't hold a ton of books, but definitely can serve to hold and display her faves. And now it serves a purpose. I'm pretty much in love with it.

This handy dandy laundry bag was crafted out of an Anthropologie dish towel and some quilting fabric. I can't claim this idea as my own - I saw it done on an HGTV show. Isn't the towel adorable? Anthro has the best dish towels - they charge a pretty penny for them (this one ran me $24) but totally worth it when you get a fabulous custom laundry bag. I just sewed it up with coordinating fabric, and added the tabs at the top to hang on the wall. The rack with the faux doorknobs came from HomeGoods - I just painted it white (it was a distressed cream before, which was great, but really stood out against the whiteness of the rest of the furniture). I'm really happy with the laundry bag - and when it gets dirty I can throw the whole thing in the wash and not worry about it!
I wanted a really "beefy" curtain rod - but I didn't want to pay for one - so I came up with this alternative... It's two 2-inch dowel rods from Lowes (about $7 each), painted white, with plain wood finials attached on each end. The whole thing cost less than $25. David attached the two dowel rods together with just a threaded rod screwed into one end of each rod. The finials are actually the same feet that are on the storage piece. Three plain wood brackets hold the whole thing up there. I'm pretty darn pleased with how it turned out looks-wise, and can't be happier about the price. Drapery hardware is crazy expensive! I liked it so much I did the same thing for our master bedroom windows, but stained it a dark brown instead of painting it white.
So I'm generally anti-theme when it comes to pretty much everything in life. So I definitely didn't want to have a themed nursery. However, as the room has progressed, it has taken on a certain, well, let's call it
motif. Perhaps you've noticed the repeated appearance of birds in the room (birds hanging from a nest-like mobile, birds on the lamps/lampshades, birds on the dishtowel turned laundry bag, and my chandelier/bird print). It wasn't intentional, but I definitely ended up with a bird-themed room. I truly love it though, and wouldn't change a single thing about it. It doesn't smack you over the head when you walk in the room: "this is a bird-themed room" - so from that perspective I've forgiven myself for having a theme. I hope you will too.


 When we moved in to this house, this room was "lovingly" called "the wood room" because it was wood paneled, and pretty much brown everywhere. All the trim was wood, the closet doors were bare wood - even the light switch cover was brown. Pretty much the most heinous room you can image. Here's a "before" picture (Yikes!):


 The crib is made by Stanley, and I totally lucked out by scoring a floor model from a local boutique that carries that brand for a fantastic price. The best part - the crib was still in the box, it had been purchased to be a floor model but never made it on the floor!


